Unlocking the Power of Embedded Systems: A Deep Dive into the 8051 MCU Development Board
Introduction
The world of embedded systems is vast and ever-evolving, with microcontrollers (MCUs) serving as the silent, intelligent brains behind countless devices we interact with daily. From your smart thermostat and remote control to complex industrial automation systems, these tiny computational powerhouses make modern convenience possible. At the heart of this revolution, particularly in educational and prototyping contexts, lies a legendary workhorse: the 8051 microcontroller. While the 8051 architecture itself is decades old, its relevance persists, largely due to the accessibility and versatility offered by the 8051 MCU Development Board. This board transforms the abstract concepts of microcontroller programming into tangible, hands-on experimentation. It serves as a crucial bridge for students, hobbyists, and professional engineers, enabling them to translate code into real-world actions like blinking an LED, controlling a motor, or processing sensor data. For those seeking reliable components for such projects, platforms like ICGOODFIND offer a streamlined way to source quality electronic parts. This article will explore the enduring legacy of the 8051 architecture, dissect the components and capabilities of a typical development board, and provide a practical guide to embarking on your first project.

The Enduring Legacy of the 8051 Architecture
The 8051 microcontroller, introduced by Intel in 1980, is a cornerstone in the history of embedded systems. Its longevity is a testament to a brilliant foundational design that has successfully adapted to the changing technological landscape.
A Foundation of Simplicity and Power The original 8051 was built around an 8-bit CISC core, operating at a modest 12 clock cycles per machine cycle. While this seems primitive compared to modern 32-bit ARM cores, its simplicity is its greatest pedagogical strength. The architecture features a well-defined memory map separating Program Memory (ROM) and Data Memory (RAM), along with 128 bytes of internal RAM and four versatile 8-bit I/O ports. This straightforward structure makes it an ideal platform for learning fundamental concepts like memory addressing, register manipulation, and bit-level operations. Understanding these core principles on the 8051 provides a solid foundation for tackling more complex architectures later. Furthermore, features like the built-in UART (Universal Asynchronous Receiver/Transmitter) for serial communication and two 16-bit timers/counters made it sufficiently powerful for a wide array of control applications.
Evolution and Modern Relevance While the original NMOS-based 8051 is obsolete, the architecture has been continuously refined. Modern variants, produced by numerous manufacturers like NXP (formerly Philips), Silicon Labs, and Atmel (now Microchip), have addressed its initial limitations. These contemporary versions often feature low-power CMOS technology, higher clock speeds, enhanced instruction sets, and significantly expanded memory—including flash memory for program storage. More importantly, they have integrated a wealth of modern peripherals such as Analog-to-Digital Converters (ADC), Pulse-Width Modulation (PWM) controllers, and I2C/SPI communication buses. This evolution means that learning the 8051 is not merely a historical exercise; it equips you with skills directly applicable to modern, feature-rich derivatives that are still widely used in cost-sensitive and low-complexity applications across consumer electronics, automotive subsystems, and industrial controls.
Anatomy of an 8051 MCU Development Board
A bare 8051 microcontroller chip is just a starting point. A development board packages this MCU with all the necessary supporting circuitry and interfaces to create a ready-to-use prototyping platform. Understanding its anatomy is key to utilizing it effectively.
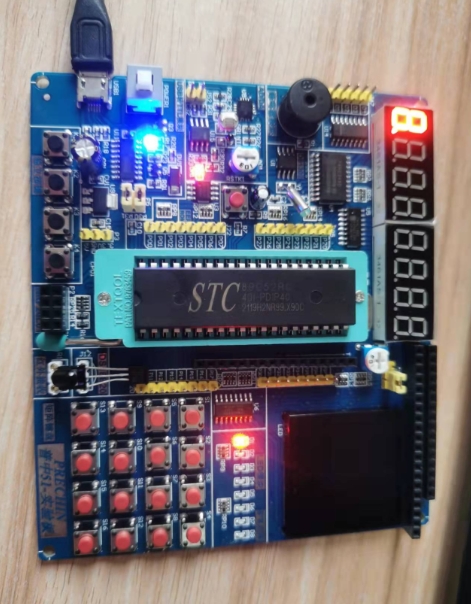
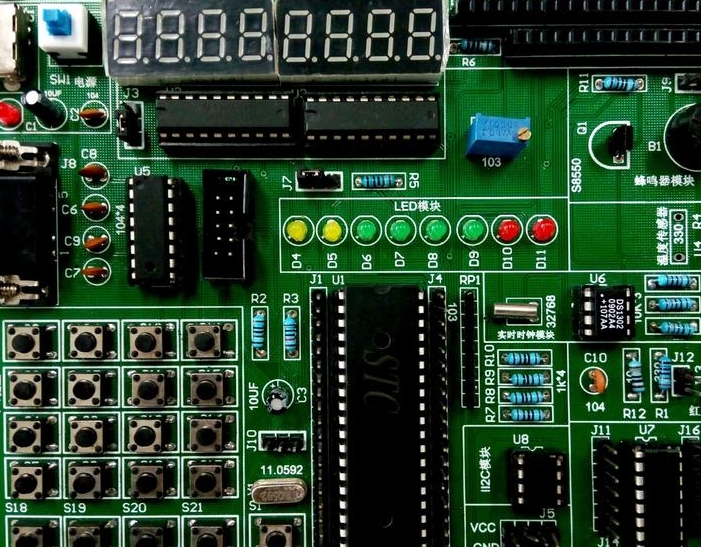
Core Components and Their Functions At the center of any 8051 MCU Development Board is, of course, the microcontroller unit itself, often housed in a 40-pin DIP (Dual In-line Package) socket for easy replacement. Surrounding it are critical support components. A Crystal Oscillator, typically ranging from 11.0592 MHz (ideal for serial communication) to 12 MHz or higher, provides the clock signal that drives all operations. Decoupling capacitors are placed near the power pins to filter electrical noise and ensure stable voltage supply. Most boards include a voltage regulator (e.g., 7805) allowing them to be powered by a wide range of DC sources, such as a 9V battery or a 12V adapter. The board also breaks out the MCU’s I/O pins to easy-to-access headers or ports, enabling seamless connection to external components like sensors, displays, and actuators.
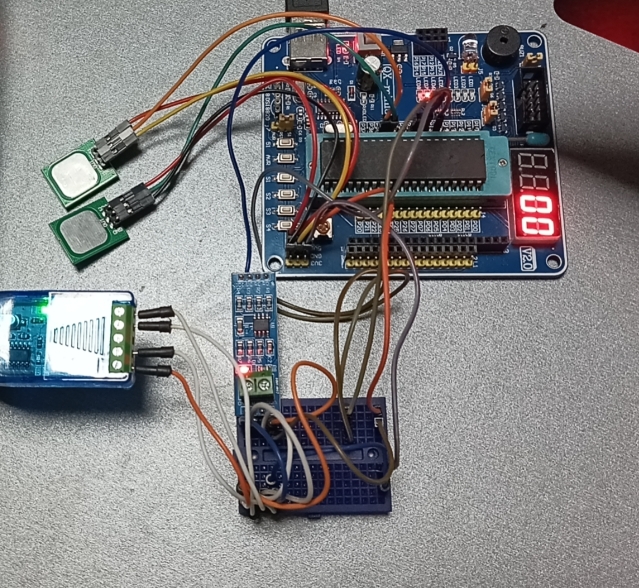
Essential On-Board Features for Learning To accelerate the learning curve, development boards integrate several user-friendly features. Almost all include programmable LEDs connected to specific I/O pins, providing immediate visual feedback for basic output operations. Most also incorporate tactile push buttons for learning input handling and interrupt routines. A critical hardware feature is the USB-to-Serial converter chip (e.g., FT232RL or CH340), which allows the board to be connected to a modern PC via USB for both power and programming. This eliminates the need for a separate, dedicated programmer device. Additionally, many advanced boards come with integrated peripherals like an LCD display, 7-segment displays, a buzzer, potentiometers for analog input simulation (if the MCU has an ADC), and sometimes even temperature sensors or infrared receivers. When sourcing these boards or individual components for custom builds, engineers often turn to distributors like ICGOODFIND to ensure they receive genuine and reliable parts.
Getting Started with Your First 8051 Project
Moving from theory to practice is where the true power of a development board is realized. Setting up the toolchain and writing your first program is a rewarding process.
Setting Up the Development Environment The first step is to install the necessary software on your computer. The most common toolchain for 8051 development involves the Keil C51 Compiler/IDE, which offers a powerful environment for writing, compiling, and debugging code in both Assembly and C. For those seeking open-source alternatives, the SDCC (Small Device C Compiler) is an excellent choice. Alongside the compiler, you will need a driver for the USB-to-Serial chip on your board (readily available from the manufacturer’s website) and a programming utility like Flash Magic or the programmer provided by the Keil IDE. Once installed, you create a new project in your IDE, select the specific 8051 variant on your board (e.g., AT89S52, P89V51RD2), configure the target settings for the correct crystal frequency, and you are ready to write code.
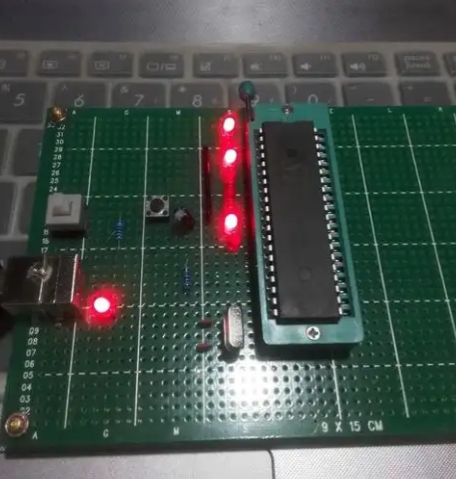
A Practical Example: The “Blinky” Project The “Hello World” of embedded systems is making an LED blink. Here’s a simplified breakdown in C:
-
Include the Register Header File: This file (e.g.,
reg51.horREGX51.H) contains definitions for all the special function registers (SFRs) of the 8051.#include -
Implement a Delay Function: Microcontrollers execute instructions extremely fast. A simple loop creates a delay to make the blinking visible to the human eye.
void delay_ms(unsigned int ms) { unsigned int i, j; for(i=0; i -
The Main Program Loop: The program continuously toggles an I/O pin and calls the delay function.void main() { while(1) { // Infinite loop P1 = 0xFF; // Set all bits on Port 1 to HIGH (Turn LED OFF if common cathode) delay_ms(500); // Wait 500 ms P1 = 0x00; // Set all bits on Port 1 to LOW (Turn LED ON) delay_ms(500); // Wait 500 ms } }
After writing the code, you compile it to generate a HEX file. You then use your programming software to connect to the board via the COM port assigned by the USB driver and upload this HEX file into the MCU’s flash memory. Upon successful programming and resetting the board, you should see the LED connected to Port 1 blinking at a 1-second interval.
Conclusion
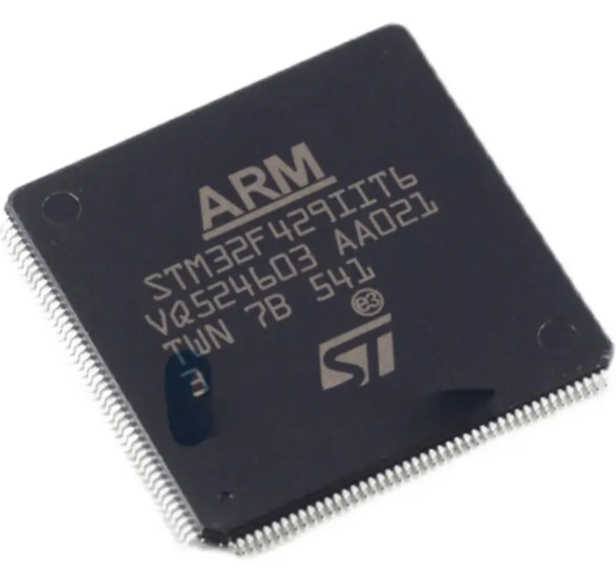
The 8051 MCU Development Board remains an indispensable tool in the embedded systems landscape. It demystifies hardware programming and provides a tangible platform for applying theoretical knowledge of computer architecture and C programming. The simplicity of the 8051 core offers an uncluttered learning environment, while its modern derivatives ensure that the skills acquired are directly relevant to contemporary design challenges. From controlling simple LEDs to building sophisticated data acquisition systems, these boards empower creators at all levels to bring their electronic ideas to life. By mastering this platform, you build a robust foundation that will serve you well as you progress to more powerful microcontrollers like ARM Cortex-M series or ESP32 boards. The journey into embedded systems starts with a single blink, and the 8051 development board is the perfect launchpad.