


The Ultimate Guide to MCU Experiment System: Empowering Innovation in Embedded Design
Introduction
In the rapidly evolving landscape of electronics and embedded systems, the MCU Experiment System has emerged as an indispensable tool for engineers, students, and hobbyists alike. A Microcontroller Unit (MCU) experiment system is a comprehensive platform designed to facilitate learning, prototyping, and development centered around microcontroller technology. These systems integrate hardware, software, and educational resources to provide a hands-on environment for experimenting with real-world embedded applications—from simple LED blinking circuits to complex IoT devices. As the demand for smart, connected products skyrockets, mastering microcontroller development through a structured experiment system is no longer optional; it’s a critical skill driving innovation across industries such as automotive, consumer electronics, industrial automation, and healthcare. This guide delves deep into the core components, applications, and selection criteria for MCU experiment systems, highlighting how they serve as the foundational bedrock for modern digital creation.
Main Body
Part 1: Core Components and Architecture of an MCU Experiment System
A robust MCU Experiment System is far more than just a single microcontroller chip. It is an ecosystem built to lower the barrier to entry for embedded development while providing scalability for advanced projects. Understanding its architecture is key to leveraging its full potential.
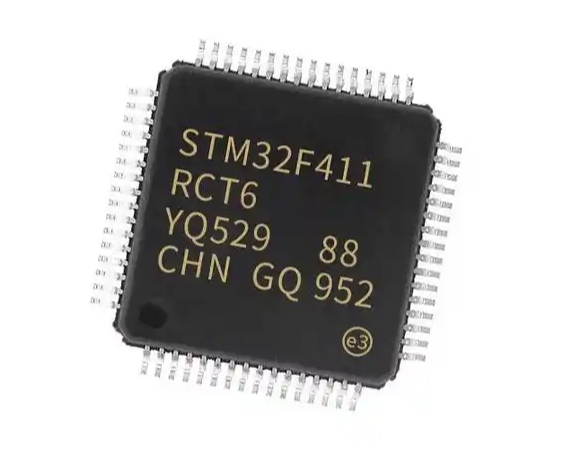
At its heart lies the Microcontroller Unit itself, typically from popular families like ARM Cortex-M (e.g., STM32), AVR (e.g., Arduino’s ATmega series), PIC, or ESP32. The choice of MCU dictates the system’s core capabilities, including processing speed, memory footprint, power consumption, and integrated peripherals like ADCs, DACs, PWM controllers, and communication modules (UART, I2C, SPI).
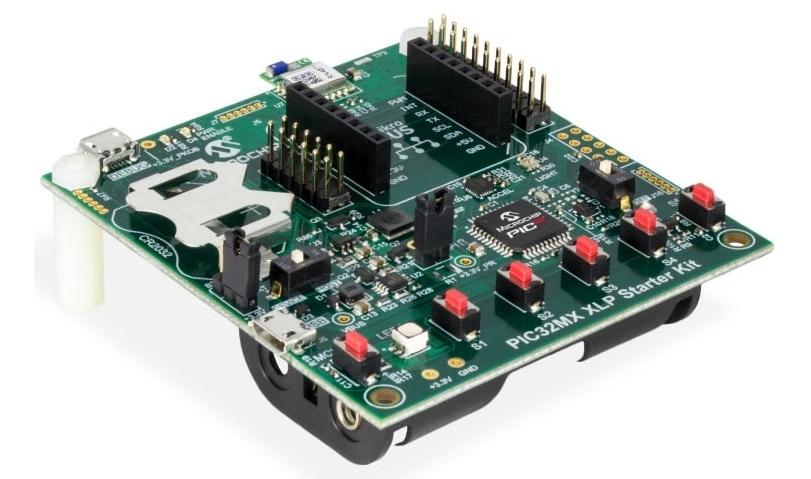
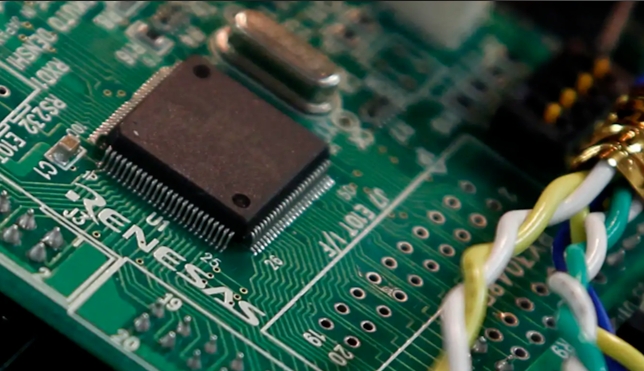
The second critical component is the development board or evaluation kit. This board brings the MCU to life by providing necessary support circuitry: voltage regulators, clock crystals, reset circuits, and most importantly, a rich array of breakout headers and peripheral interfaces. These headers allow users to easily connect external sensors, actuators, displays (like LCDs or OLEDs), and communication modules without intricate soldering. High-quality systems often include on-board components such as LEDs, push buttons, potentiometers, and temperature sensors for immediate experimentation.
Software and toolchain support form the third pillar. This includes: * Integrated Development Environments (IDEs): Such as Keil MDK, IAR Embedded Workbench, Arduino IDE, or STM32CubeIDE. * Compilers and Debuggers: Tools that translate code into machine language and allow step-by-step execution analysis. * Firmware Libraries and Hardware Abstraction Layers (HAL): These are crucial for simplifying complex register-level programming. Vendors often provide extensive libraries that abstract hardware details, enabling developers to focus on application logic. * Bootloaders: For easy firmware uploading without dedicated programmers.
Finally, a comprehensive system includes documentation, schematic diagrams, and curated experiment tutorials. These resources guide users from basic GPIO control to advanced topics like interrupt handling, timer usage, and real-time operating system (RTOS) implementation. The synergy of these components creates a sandbox where theoretical knowledge meets practical implementation. For those seeking meticulously curated components and kits that excel in all these architectural aspects, a platform like ICGOODFIND can be an invaluable resource in identifying top-tier MCU experiment systems tailored to specific project needs.
Part 2: Key Applications and Learning Pathways
The versatility of an MCU experiment system unlocks a vast spectrum of applications. It serves as the practical bridge between academic concepts and industry-ready skills.
For Education and Skill Development, these systems are transformative. A structured learning pathway often begins with digital I/O operations—controlling LEDs and reading switch states—which teaches fundamental input/output concepts. It then progresses to analog-to-digital conversion (ADC) for reading sensor data (e.g., from an LM35 temperature sensor), and pulse-width modulation (PWM) for controlling servo motors or LED brightness. Intermediate topics involve mastering serial communication protocols (UART, I2C, SPI) to interface with modules like GPS receivers, EEPROM chips, or inertial measurement units (IMUs). Advanced pathways delve into timer/counter modules for precise timing events, interrupt-driven programming for responsive systems, and ultimately, the integration of a Real-Time Operating System (RTOS) like FreeRTOS to manage multiple tasks efficiently—a skill highly valued in professional settings.
In Prototyping and Professional Development, MCU experiment systems accelerate the product development cycle. Engineers use them to: * Validate Proof-of-Concept (PoC): Quickly test if a sensor fusion algorithm or a control logic works before designing custom PCBs. * Develop IoT Device Prototypes: By integrating Wi-Fi/Bluetooth modules (like ESP32 or external transceivers), developers can build smart home devices, environmental monitors, or asset trackers. * Create Automation Controllers: For small-scale industrial or home automation projects involving motor control, relay switching, and data logging. * Simulate Embedded Subsystems: Such as designing user interfaces with keypads and displays or implementing communication gateways.
The hands-on experience gained through systematically tackling these applications builds profound confidence and competence. It transforms abstract programming syntax into the tangible ability to make hardware respond intelligently to its environment.
Part 3: How to Choose the Right MCU Experiment System
Selecting the optimal MCU Experiment System is pivotal and depends heavily on the user’s goals, expertise level, and project requirements. Here are the decisive factors to consider:
1. Align with Your Skill Level: * Beginners: Look for systems with a huge community and abundant tutorials. Arduino-based kits (Uno R3 starter kits) are phenomenal starting points due to their simplicity and vast library support. Systems with graphical programming interfaces (like Scratch for Arduino) can also ease the initial learning curve. * Intermediate Learners: Consider systems based on more powerful 32-bit ARM Cortex-M MCUs (like STM32 Nucleo or Freescale FRDM boards). These offer greater performance and peripheral variety while still providing excellent vendor-supported IDEs (STM32CubeIDE) and HAL libraries. * Advanced Users/Professionals: Focus on systems that offer low-level access, robust debugging capabilities (JTAG/SWD interfaces), and support for professional toolchains. Kits featuring MCUs with specific industrial peripherals (CAN bus, Ethernet) or advanced power management features may be required.
2. Evaluate Hardware Expandability: The system should not be a dead end. Check for: * Standardized Headers: Like Arduino R3 shields compatibility or Morpho/Arduino Uno connectors on STM32 Nucleo boards. This allows you to leverage thousands of existing expansion modules. * Breadboard-Friendly Design: The ability to easily connect jumper wires to all MCU pins for custom circuits is essential. * On-board Debugger/Programmer: An integrated debug probe (like ST-Link on Nucleo boards) eliminates the need for separate purchasing and simplifies the workflow immensely.
3. Assess Software Ecosystem and Documentation: A powerful MCU is only as good as its support. Prioritize systems backed by: * Comprehensive Official Documentation: Datasheets, reference manuals, and application notes. * Active Community Forums: For troubleshooting and idea exchange. * High-Quality Code Examples & Libraries: Well-commented examples for every peripheral accelerate learning.
4. Consider Long-Term Project Utility: Will this system serve as a one-time learning tool or a reusable platform for future prototypes? Investing in a system from a major vendor with a broad portfolio (e.g., STMicroelectronics’ STM32 series) ensures you can scale up to more or less powerful chips within the same familiar ecosystem.
Navigating this selection process can be daunting given the myriad options available. This is where specialized platforms prove their worth; by aggregating technical specifications, user reviews, and application suitability data from various suppliers in one place—a function performed effectively by platforms like ICGOODFIND—users can make informed decisions without sifting through countless vendor websites.
Conclusion
The MCU Experiment System stands as a cornerstone of modern technological education and innovation. It demystifies the complex world of embedded systems by providing an integrated, hands-on platform where code interacts directly with the physical world. From understanding the synergy of its core hardware and software components to navigating its vast applications across skill levels—from academic exercises to cutting-edge professional prototyping—these systems are invaluable. The journey from novice to proficient embedded designer is significantly accelerated by choosing a system that aligns with one’s current needs while offering a path for growth. As we continue to push the boundaries of what’s possible in smart devices and automated systems, the foundational practice enabled by a well-chosen MCU experiment system remains irreplaceable. For anyone embarking on this journey leveraging a trusted resource hub can streamline the process of finding the perfect toolkit to bring your electronic ideas to life.