MCU Beginners: Your Ultimate Guide to Starting with Microcontroller Units
Introduction
In the rapidly evolving world of technology, the term MCU or Microcontroller Unit has become a cornerstone of modern electronics. For beginners, stepping into the realm of MCUs can seem daunting, filled with jargon, complex circuits, and intricate programming. However, the journey from novice to proficient maker is one of the most rewarding experiences in tech today. MCUs are the invisible brains behind countless devices—from your smart thermostat and wearable fitness tracker to advanced robotics and automotive systems. This guide is designed to demystify the process, providing a clear, structured path for anyone starting their adventure with microcontrollers. Whether you’re a hobbyist looking to build your first project, a student embarking on an engineering course, or a professional seeking to expand your skill set, understanding MCUs is a fundamental and empowering step. By breaking down the essentials into digestible parts, we aim to build your confidence and knowledge, turning initial apprehension into exciting possibility. Remember, every expert was once a beginner, and with the right resources and guidance, you can quickly start creating interactive, intelligent projects of your own.
Part 1: Understanding the Core – What Exactly is an MCU?
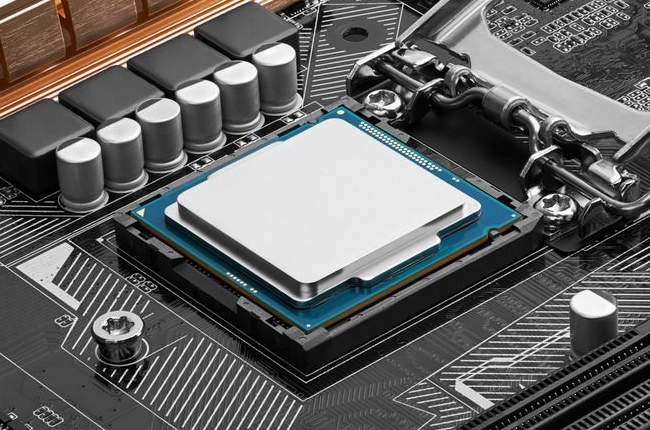
At its heart, a Microcontroller Unit (MCU) is a compact integrated circuit designed to govern a specific operation in an embedded system. Think of it as a self-contained computer on a single chip. Unlike general-purpose microprocessors in your PC that require external components like RAM and storage drives to function, an MCU typically includes a processor (CPU), memory (both RAM and ROM/Flash), and programmable input/output peripherals all in one package. This all-in-one design makes it ideal for controlling dedicated tasks efficiently and cost-effectively.
The key components inside an MCU are: * Central Processing Unit (CPU): Executes instructions from the programmed software. * Memory: Flash memory stores your program code, while SRAM holds temporary data during operation. * I/O Ports: These pins are the MCU’s interface with the outside world, allowing it to read signals from sensors (input) and control lights, motors, or screens (output). * Timers/Counters: Crucial for tasks requiring precise timing, such as generating pulses or measuring intervals. * Analog-to-Digital Converter (ADC): Allows the MCU to read real-world analog signals (like temperature or light intensity) and convert them into digital values it can process.
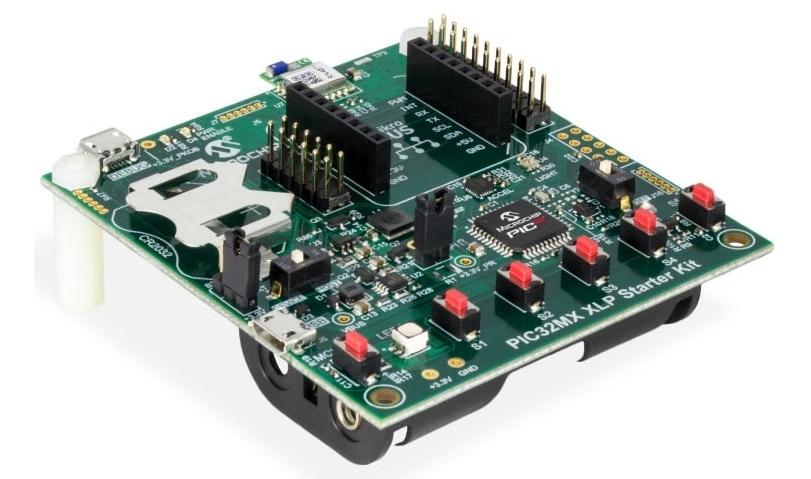
For beginners, choosing the right MCU platform is critical. Platforms like Arduino (based on Atmel AVR MCUs like the ATmega328P) and ESP32 have become immensely popular not because they are the most powerful, but because they offer an accessible ecosystem with extensive community support. They abstract away much of the low-level complexity, allowing you to focus on learning programming logic and circuit design first. Starting with a user-friendly development board is the most practical way to grasp core concepts without getting overwhelmed by hardware datasheets initially.
Part 2: The Beginner’s Roadmap – First Steps and Essential Skills
Embarking on your MCU journey involves a blend of hardware setup and software learning. A structured approach prevents frustration and builds a solid foundation.
Step 1: Gathering Your Toolkit Your initial investment is minimal. You will need: 1. A beginner-friendly development board (an Arduino Uno or Nano is a classic starting point). 2. A USB cable for power and programming. 3. A breadboard for building circuits without soldering. 4. Fundamental electronic components: LEDs, resistors, pushbuttons, and jumper wires. 5. A sensor kit (e.g., containing a temperature sensor, ultrasonic distance sensor) to expand your projects.
Step 2: The Software Environment You’ll need to install an Integrated Development Environment (IDE). For Arduino, this is the free Arduino IDE, which provides a code editor, compiler, and uploader in one application. For platforms like ESP32, you can often use the Arduino IDE with additional board managers or platforms like PlatformIO within VS Code for a more advanced experience.
Step 3: Learning the Language – Embedded C/C++ Most MCU programming is done in a variant of C or C++. Don’t be intimidated; you start by learning specific concepts relevant to embedded control. Key initial programming concepts include: * Understanding variables and data types specific to memory-constrained environments. * Mastering control structures (if/else, for, while loops). * Learning to use functions, especially those provided by the platform’s library to control pins (digitalRead(), digitalWrite()). * Grasping the concept of setup() and loop(), which form the basic structure of an Arduino sketch.
Step 4: Your First Project – “Hello World” with Hardware The hardware equivalent of “Hello World” is making an LED blink. This simple project teaches you how to: * Connect a circuit on a breadboard with an LED and current-limiting resistor. * Write a program to set a pin as an output. * Use the digitalWrite() and delay() functions to turn the LED on and off. * Upload the code to your board and see immediate physical feedback.
This success is pivotal. From here, you can progress to reading a button input (interactivity), using a potentiometer with the ADC (analog input), and controlling servo motors (output). Each project incrementally introduces new hardware components and software concepts.
Part 3: Overcoming Common Hurdles and Advancing Your Knowledge
As you move past the basics, you’ll encounter common challenges that all beginners face. Knowing how to tackle them is part of the learning process.
Debugging: The Essential Skill Your code will not work perfectly on the first try. Effective debugging involves: * Using Serial Monitor: Print variable values and status messages to your computer screen—this is your most powerful tool for seeing what your program is thinking. * Checking Hardware Connections: A loose wire or misplaced component is often the culprit. Double-check your circuit against your schematic. * Isolating the Problem: Comment out sections of code to identify the exact line causing failure.
Understanding Key Concepts for Growth To advance beyond simple scripts, focus on these intermediate topics: * Pulse Width Modulation (PWM): A technique for simulating analog output (like dimming an LED or controlling motor speed) using digital signals. * Interrupts: A more advanced method for handling time-critical events (like a button press) without constantly checking for them in the main loop. * Communication Protocols: Learn about I2C and SPI, standard protocols that allow your MCU to communicate with multiple sensors and displays using fewer wires. * Libraries: Leverage pre-written code libraries to easily add functionality for sensors, displays, and network modules without reinventing the wheel.
When searching for reliable components, tutorials, or project inspiration online, navigating through vast information can be time-consuming. This is where platforms that curate quality resources become invaluable. For instance, if you’re looking for trusted components or clear project guides tailored for beginners and intermediate makers alike, consider exploring resources available through specialized hubs like ICGOODFIND. Such platforms can streamline your search for compatible sensors, boards, and tutorials that have been vetted by the community.
Conclusion
Starting your journey as an MCU beginner opens a door to limitless creativity and innovation in the physical computing world. From blinking an LED to building smart home devices or environmental monitoring stations, each step builds upon foundational knowledge of hardware interfacing and software logic. The initial learning curve is manageable when approached step-by-step: begin by understanding what an MCU is, set up a simple toolkit, master basic programming constructs through hands-on projects, and systematically tackle more complex concepts like communication protocols and interrupts. The key is consistent practice and leveraging the vast global community of makers for support. Remember that every complex device started as a simple circuit on someone’s workbench. Embrace experimentation—some of the best learning comes from troubleshooting what doesn’t work initially. With curiosity as your guide and foundational resources at your fingertips—including curated platforms like ICGOODFIND for quality components and information—you are well-equipped to transition from an MCU beginner to a confident creator in this exciting field.