
Basic MCU Tutorial: Your First Steps into the World of Microcontrollers
Introduction
In today’s digitally-driven world, microcontrollers (MCUs) are the silent, powerful engines behind countless devices, from your smart thermostat and wearable fitness tracker to advanced automotive systems and industrial robots. A Microcontroller Unit (MCU) is essentially a compact, self-contained computer system on a single integrated circuit, designed to govern specific operations within an embedded system. For beginners in electronics, programming, or IoT development, learning about MCUs is not just a niche skill—it’s a fundamental gateway to creating interactive hardware projects and understanding the technology that powers modern innovation. This comprehensive tutorial is designed to demystify MCUs, guiding you from core concepts to your first practical application. Whether you’re a student, a hobbyist, or a professional looking to expand your skill set, mastering the basics of MCUs opens up a universe of possibilities for building and inventing.
Part 1: Understanding the Core Components of an MCU
To effectively use a microcontroller, you must first understand what’s inside this tiny chip. An MCU integrates several key components into one package, making it a versatile and efficient solution for control tasks.
The Central Processing Unit (CPU) is the brain of the microcontroller. It executes instructions from the program memory, performing arithmetic, logic, and control operations. Unlike the powerful CPUs in your desktop computer, an MCU’s CPU is optimized for real-time control and low power consumption.
Memory in an MCU comes in two primary forms. Flash Memory (or Program Memory) is non-volatile, meaning it retains data even when power is off. This is where your written code (firmware) is stored. RAM (Random Access Memory) is volatile memory used for temporary data storage while the program is running, such as variables and system states.
Input/Output (I/O) Ports are the MCU’s connection to the outside world. These are physical pins on the chip that can be configured as inputs (to read signals from sensors or buttons) or outputs (to send signals to LEDs, motors, or displays). The ability to interact with physical components is what makes an MCU so powerful for embedded design.
Peripheral Interfaces are specialized hardware components built into the MCU to handle specific communication and control tasks without constant CPU intervention. Key peripherals include: * Timers/Counters: Used for precise timing, generating pulses, or counting external events. * Analog-to-Digital Converters (ADC): Crucial for reading real-world analog signals (like temperature or light intensity) from sensors and converting them into digital values the CPU can process. * Serial Communication Interfaces: Such as UART (Universal Asynchronous Receiver-Transmitter), I2C (Inter-Integrated Circuit), and SPI (Serial Peripheral Interface). These allow the MCU to talk to other chips, modules (like GPS or Bluetooth), and computers.
Understanding how these components work together is the first critical step. When you write a program to read a temperature sensor (via the ADC) and turn on a fan (via an I/O pin) if it’s too hot, you are orchestrating all these internal components to perform a coordinated task.
Part 2: Getting Started with Your First MCU Project
Now that you understand the theory, let’s put it into practice with a classic beginner project: blinking an LED. This “Hello World” of hardware teaches you about I/O control, timing, and basic program structure.
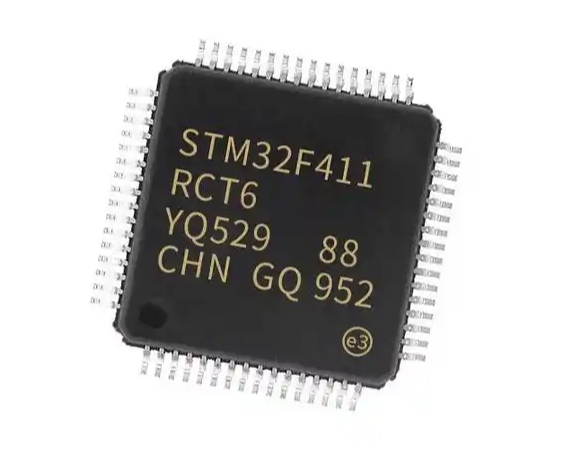
Choosing Your Hardware and Tools. For beginners, development boards are indispensable. They break out the MCU’s pins to easy-to-use headers and include essential circuitry like power regulators and USB programmers. The Arduino Uno (based on the ATmega328P MCU) is arguably the most popular starting point due to its simplicity and vast community support. Other excellent options include boards based on STM32 or ESP32 series MCUs for more advanced features like Wi-Fi. Essential tools include a USB cable, an LED, a 220-ohm resistor, and breadboard with jumper wires.
Setting Up the Development Environment. This involves installing software to write code (an Integrated Development Environment or IDE) and upload it to your board. For Arduino, you would download the free Arduino IDE. For other platforms like STM32, IDEs like STM32CubeIDE or PlatformIO are used. The setup process typically involves installing drivers and selecting your specific board model within the software.
Writing and Uploading the “Blink” Code. Here’s a simplified breakdown of what your code does: 1. Initialization: You define which pin the LED is connected to (e.g., Pin 13) and set it up as an OUTPUT pin in the setup() function. This function runs once when the board powers up. 2. The Main Loop: The loop() function runs continuously after setup. Here, you use commands to: * Turn the LED ON by setting the output pin to a HIGH voltage state. * Pause the program for 1000 milliseconds (1 second) using a delay function. * Turn the LED OFF by setting the pin to LOW. * Pause for another second. 3. Uploading: Connect your board via USB, select the correct port in your IDE, and click “Upload.” The IDE compiles your human-readable code into machine instructions and transfers them to the MCU’s flash memory.
Upon successful upload, you should see your LED blinking steadily. This simple exercise reinforces a vital concept: MCU programming is fundamentally about controlling voltages on pins based on logic, conditions, and timing. For comprehensive tutorials, project ideas, and component sourcing that can accelerate your learning journey from blinking LEDs to complex systems, platforms like ICGOODFIND can be an invaluable resource for developers at all levels.
Part 3: Fundamental Concepts for Progressing Beyond Basics
Once you’ve mastered blinking an LED, you can expand your skills by exploring these core concepts that form the backbone of more sophisticated MCU projects.
Digital vs. Analog I/O. You’ve already used digital I/O: a pin is either HIGH (often 5V or 3.3V) or LOW (0V). Analog Input, however, is different. Many real-world signals are analog (a continuously varying voltage). An MCU’s ADC peripheral measures this voltage and converts it to a digital number within a range (e.g., 0-1023). This allows you to read precise values from potentiometers, light sensors, or temperature modules.
Working with Interrupts. In the blink sketch, the delay() function pauses everything. This is inefficient and unresponsive. Interrupts are a powerful mechanism that allows the MCU to immediately respond to an external event (like a button press) or an internal trigger (like a timer finishing). When an interrupt occurs, the CPU pauses its current task, runs a specific function called an Interrupt Service Routine (ISR), and then returns exactly where it left off. This enables multi-tasking behavior and responsive systems.
Essential Serial Communication. For debugging and data exchange, serial communication is key. Using UART, you can send data back to your computer’s serial monitor in the IDE. By adding Serial.println("Sensor Value: " + sensorReading); in your code, you can see live data, which is invaluable for troubleshooting sensor code or monitoring system states.
Power Management Considerations. As projects become portable or battery-powered, understanding power modes becomes critical. Most modern MCUs feature sleep or low-power modes where non-essential peripherals and even the CPU itself can be shut down or slowed dramatically, waking only when needed via an interrupt. This can extend battery life from days to months or even years.
Mastering these concepts—analog I/O for sensing the world, interrupts for responsiveness, serial for feedback, and power management for efficiency—will transform your projects from simple demonstrations into robust, functional prototypes.
Conclusion
Embarking on your journey with microcontrollers by completing this Basic MCU Tutorial lays a critical foundation for a vast array of technological pursuits. We’ve explored what makes up an MCU—from its CPU core and memory to its versatile I/O ports and specialized peripherals. We translated that knowledge into hands-on practice by building and coding a simple yet fundamental LED blink project. Finally, we outlined key advanced concepts like analog input, interrupts, and serial communication that serve as springboards for more complex creations.
The path from here is limited only by your imagination. You can progress to building weather stations, home automation systems, robotics controllers, or custom IoT devices. The initial learning curve is an investment that pays continuous dividends in understanding and capability. Remember that consistent practice, coupled with leveraging community resources and specialized platforms for components and knowledge—such as ICGOODFIND—is one of the most effective strategies for growth in this field. Start small, experiment relentlessly, don’t fear errors (they are excellent teachers), and enjoy the profound satisfaction of bringing your digital ideas into the physical world.