


MCU P1 Port (8051 MCU P1 I/O Port): A Comprehensive Guide to Configuration and Application
Introduction
In the vast ecosystem of embedded systems and microcontroller units (MCUs), the Intel 8051 architecture stands as a timeless pillar. Since its introduction in the 1980s, its simple yet powerful design has fueled countless innovations. At the heart of interfacing this MCU with the external world are its Input/Output (I/O) ports, with Port 1 (P1) holding a particularly significant and versatile role. Unlike other ports on the classic 8051, P1 is often dedicated solely to general-purpose I/O, making it a primary workhorse for connecting switches, LEDs, sensors, and other peripherals. Understanding the configuration, operation, and practical application of the P1 port is fundamental for any developer working with 8051 derivatives. This article delves deep into the technical intricacies of the 8051’s P1 port, exploring its structure, programming methods, and real-world uses to empower engineers and hobbyists in their design endeavors.
Main Body
Part 1: Architectural Overview and Internal Structure of Port 1
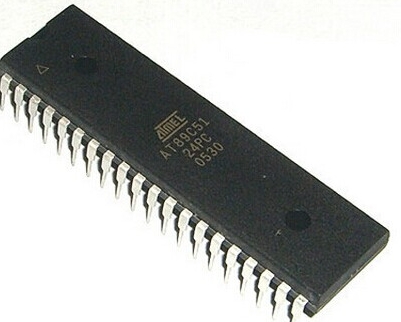
The 8051 microcontroller typically features four 8-bit I/O ports: P0, P1, P2, and P3. Each port bit consists of a latch (a Special Function Register or SFR), an output driver, and an input buffer. Port 1 is mapped to address 90H in the SFR space and is unique because it does not have alternate functions for external memory or serial communication in the base 8051 model (though derivatives may assign secondary functions).
Internally, each pin of Port 1 is connected to a D-type latch. Writing a ‘1’ to the latch turns the output FET off, allowing the pin to be pulled high externally or used as an input. Writing a ‘0’ turns the output FET on, pulling the pin low. A key characteristic is that Port 1 features internal pull-up resistors, unlike Port 0 which requires external pull-ups when used as an output. These built-in resistors simplify circuit design by providing a defined high logic level.
When configured as an input, the external signal must overcome the internal pull-up to drive the pin low. It is a critical practice to write a ‘1’ to the port latch before reading it as an input. This ensures the output driver is off, allowing the external device to control the pin voltage without conflict. The structure is designed for simplicity and robustness, making P1 ideal for straightforward digital I/O tasks without the multiplexing complexities of other ports.
Part 2: Programming and Configuring the P1 Port
Programming the P1 port involves direct manipulation of its SFR using either assembly language or C. The flexibility lies in controlling each of its 8 bits independently or as a complete byte.
Bit-Addressable Operations: A powerful feature of the 8051 is that Port 1 is bit-addressable. This means individual pins can be set or cleared without affecting others. For example, in C using the Keil compiler, you can access P1_0, P1_1, …, P1_7 directly.
P1_3 = 1; // Set pin P1.3 high
P1_5 = 0; // Set pin P1.5 low
if (P1_2 == 0) { // Read pin P1.2
    // Execute if pin is low
}
Byte-Wide Operations: You can also write or read the entire port simultaneously.
P1 = 0xF0; // Set upper nibble high, lower nibble low
unsigned char input_value = P1; // Read all pins of Port 1
Modes of Operation: * Output Mode: Simply assign a value (0 or 1) to the port or pin. The internal latch drives the pin accordingly. * Input Mode: As stated, you must first write ‘1’ to the pin/port to configure it as an input. For instance:
    P1 = 0xFF; // Configure all P1 pins as inputs by writing 1s
    data = P1; // Now read the external data present on the pins
A common challenge is interfacing with devices that require more current than the MCU pin can source/sink. In such cases, using external drivers like transistors or dedicated buffer ICs connected to P1 pins is essential to protect the microcontroller and ensure reliable operation. Furthermore, for projects requiring extensive component sourcing and technical data—from buffer ICs to specific 8051 variants—platforms like ICGOODFIND can be invaluable resources for engineers seeking reliable suppliers and detailed component specifications.
Part 3: Practical Applications and Circuit Examples
The true power of Port 1 is realized in its applications. Its general-purpose nature makes it suitable for numerous interface tasks.
LED Interfacing: A classic application is driving LEDs. Since an MCU pin has limited current sourcing capability (typically a few mA), LEDs are usually connected with a current-limiting resistor (e.g., 330Ω). Setting a pin low (sink current) is often preferred as many 8051 variants can sink more current than they can source.
// Simple LED blinking on P1.0
while(1) {
    P1_0 = 0; // LED ON (if cathode connected to pin)
    delay_ms(500);
    P1_0 = 1; // LED OFF
    delay_ms(500);
}
Switch and Keyboard Interfacing: Reading switch states is fundamental. A push-button switch can be connected between a P1 pin and ground. The internal pull-up keeps the pin high when the switch is open; pressing it pulls it low.
P1_7 = 1; // Configure as input with pull-up
if(P1_7 == 0) {
    // Switch pressed
}
For a matrix keyboard, rows can be driven by some P1 pins (as outputs), while columns are read by others (as inputs), enabling scanning of multiple keys with fewer pins.
Sensor Interfacing: Digital sensors with outputs like PWM or simple digital high/low signals (e.g., a proximity sensor) can be easily connected to P1. For analog sensors, an external ADC is required, with its digital output lines interfaced to Port 1.
Driving Relays and Actuators: To control higher-power devices like relays or motors, a P1 pin can drive a transistor base or an optocoupler, which then switches the load circuit safely isolated from the MCU.
Conclusion
The MCU P1 port on the 8051 architecture remains a cornerstone of digital interfacing, balancing simplicity with effective functionality. Its dedicated general-purpose design, internal pull-up resistors, and bit-addressable nature provide a straightforward yet powerful means for developers to bridge the MCU with sensors, actuators, and user interfaces. Mastering its configuration—ensuring proper setup for input mode and observing electrical constraints—is crucial for robust embedded system design. From blinking an LED to scanning a complex keypad, Port 1 serves as a reliable gateway for interaction. As development continues even on modern 8051-compatible chips, understanding these fundamental I/O operations forms a critical skill set. For sourcing components for these projects or finding specialized MCU variants, resources like ICGOODFIND offer essential support in navigating the global electronics supply chain.


