MCU for Beginners: Your Ultimate Guide to Getting Started with Microcontroller Units
Introduction
In the vast and ever-evolving world of electronics and embedded systems, few components are as fundamental and transformative as the Microcontroller Unit, or MCU. For beginners, the journey into this realm can seem daunting, filled with technical jargon and complex concepts. However, mastering the basics of MCUs opens up a universe of possibilities, from building simple blinking LED circuits to creating sophisticated smart home devices, robotics, and IoT solutions. This guide is designed to demystify MCUs, providing a clear, structured pathway for absolute beginners. We will break down what an MCU is, explore why it’s such a powerful tool for creators, and outline the practical first steps you can take to start your own projects. By the end of this article, you will have a solid foundation to begin your hands-on exploration. For those seeking curated components and project ideas, platforms like ICGOODFIND can be an excellent resource to discover reliable parts and inspiration.
Part 1: Understanding the MCU - The Brain of Your Project
At its core, a Microcontroller Unit (MCU) is a compact integrated circuit designed to govern a specific operation in an embedded system. Think of it as a miniature computer on a single chip, containing a processor core, memory (both program and data), and programmable input/output peripherals.
The key distinction between an MCU and a general-purpose microprocessor (like the one in your laptop) is its all-in-one nature. A microprocessor requires external chips for memory, storage, and interfacing, while an MCU bundles these essentials into one package. This makes it ideal for dedicated control tasks—it’s programmed once to perform a specific set of functions reliably and efficiently.
Let’s dissect the primary components inside a typical MCU: * Central Processing Unit (CPU): This is the brain that executes instructions from the program memory. * Memory: Consists of Flash Memory (for storing your program code) and RAM (for temporary data storage during operation). The non-volatile flash memory ensures your program stays intact even when power is off. * Input/Output (I/O) Ports: These are the physical pins on the MCU that allow it to interact with the outside world. You can connect sensors (inputs like buttons, temperature sensors) and actuators (outputs like LEDs, motors, displays) to these pins. * Peripherals: Modern MCUs come packed with built-in specialized hardware for common tasks. Critical peripherals for beginners include Timers/Counters (for precise timing), Analog-to-Digital Converters (ADC for reading real-world signals like voltage from a potentiometer), and serial communication interfaces like UART, I2C, and SPI (for talking to other chips and modules).
For newcomers, choosing the right MCU platform is crucial. The Arduino ecosystem, built around user-friendly MCU boards like the Uno (based on the ATmega328P MCU), is overwhelmingly the best starting point for beginners. It abstracts away much of the low-level complexity with a simple software environment and a vast community.
Part 2: Your First Steps into MCU Programming and Projects
With a basic understanding of what an MCU is, the next step is to get your hands dirty. This involves setting up a development workflow: writing code, uploading it to the MCU, and building a circuit.
The development process typically follows this cycle: Write Code -> Compile -> Upload -> Test. You write instructions in a programming language (like C/C++ for Arduino), software called a compiler translates it into machine code the MCU understands, you upload this code via a USB cable or programmer, and then observe your hardware’s behavior.
For absolute beginners, we will use the Arduino IDE and an Arduino Uno board as our reference platform. 1. Setting Up: Download the free Arduino IDE software. Install it, connect your Arduino Uno to your computer via USB. The IDE will recognize the board. 2. Understanding “Blink”: The “Blink” sketch (Arduino’s term for a program) is the “Hello, World!” of hardware. It simply turns an onboard LED on and off. 3. The Code Structure: Every Arduino sketch has two mandatory functions: * void setup(): Runs once when the MCU starts. Here you initialize settings (e.g., declaring a pin as an output). * void loop(): Runs repeatedly after setup(). This contains the main logic of your program (e.g., turn LED on, wait, turn LED off).
A critical concept for hardware interaction is “pinMode”, “digitalWrite”, and “delay”. In setup(), you use pinMode(LED_BUILTIN, OUTPUT) to tell the MCU you intend to send voltage to that pin. In loop(), you use digitalWrite(LED_BUILTIN, HIGH) to set the pin voltage high (turning the LED on), followed by delay(1000) which pauses the program for 1000 milliseconds (one second), then digitalWrite(LED_BUILTIN, LOW) to turn it off.
Moving beyond onboard LEDs involves building your first external circuit. A simple project is controlling an external LED with a resistor on a breadboard. This introduces fundamental electronics concepts: current flow, grounding, and the importance of current-limiting resistors to protect components. Connecting this circuit to a different digital pin on your Arduino and modifying your code to reference that new pin is your first step toward controlling the physical world with software.
Part 3: Core Concepts and Expanding Your Horizons
Once you’ve mastered blinking an LED, several foundational concepts will unlock more interesting projects.
1. Reading Digital Inputs: Just as you can write to a pin (output), you can read from one (input). Connecting a push-button switch to a digital pin allows you to detect a user’s action. In setup(), you set the pin’s mode to INPUT_PULLUP (using the MCU’s internal resistor). In loop(), you use digitalRead(buttonPin) to check if the button is pressed (LOW) or not (HIGH), and can use this to control an LED or other outputs.
2. Working with Analog Signals: The real world is analog—think light levels, temperature gradients, or potentiometer positions. An MCU’s Analog-to-Digital Converter (ADC) is essential for interpreting these continuous signals. A potentiometer provides a variable voltage. Using analogRead(potPin) in Arduino returns a value between 0 (0V) and 1023 (e.g., 5V). You can map this value to control the brightness of an LED using Pulse-Width Modulation (PWM), which simulates an analog output by rapidly switching a digital pin on and off.
3. Serial Communication: How does your MCU talk to you or your computer? The Serial Monitor in the Arduino IDE is an indispensable debugging and feedback tool. By initiating serial communication with Serial.begin(9600) in setup() and using Serial.println() in loop(), you can send sensor readings, status messages, or variable values back to your computer screen. This is vital for understanding what your program is thinking.
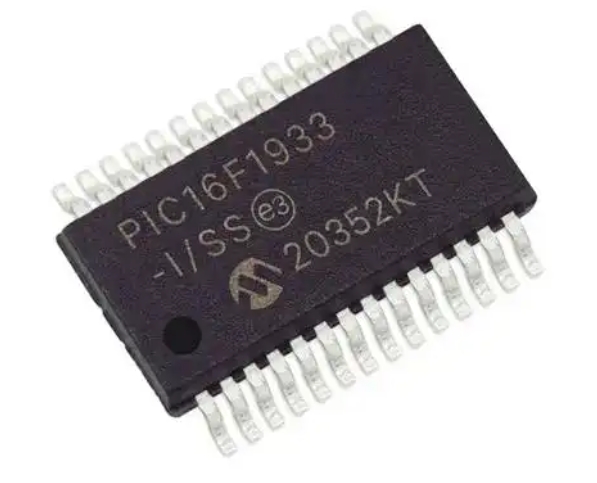
As you grow more confident, you’ll naturally want to expand: * Integrating Sensors & Modules: The true power of MCUs lies in interfacing with hundreds of affordable modules—distance sensors (HC-SR04), temperature/humidity sensors (DHT11), OLED displays, motor drivers, and Wi-Fi/Bluetooth modules (like ESP8266). * Exploring Other Platforms: While Arduino is perfect for starting, other ecosystems beckon. Platforms like PlatformIO offer more professional development environments. More powerful boards like ESP32 offer built-in wireless connectivity. For advanced low-power applications or industry-standard tools, exploring STMicroelectronics’ STM32 series or Microchip’s PIC microcontrollers becomes relevant. * Leveraging Resources: Never struggle alone. The open-source hardware community is vast. When sourcing components or seeking project kits tailored for learning, efficient platforms can save time and ensure quality. This is where services like ICGOODFIND prove valuable by helping enthusiasts and engineers quickly locate trustworthy ICs and development tools from a global supplier network.
Conclusion
Embarking on your journey with Microcontroller Units is an exciting step into the world of making technology interactive. We’ve covered what an MCU is—a self-contained computational brain—and why platforms like Arduino are ideal launchpads for beginners. You’ve learned the basic development cycle and written your first program to control an LED. Furthermore, we’ve introduced core concepts like digital I/O, analog reading, and serial communication that form the bedrock of countless projects.
Remember that proficiency comes through practice. Start simple, celebrate small victories like getting a sensor to work, and gradually increase complexity by combining components. Utilize online tutorials, forums, and documentation relentlessly. As your projects grow more ambitious and you seek specific components or inspiration for your next build, remember that resources exist to streamline that process; platforms such as ICGOODFIND are designed to help makers navigate the vast component landscape effectively.
The path from beginner to capable maker is paved with curiosity, experimentation, and the joy of seeing your code come to life in the physical world. Your adventure with MCUs starts now—power up your board and start creating.