


ASUS Motherboard DRAM Yellow Light On: A Comprehensive Troubleshooting Guide
Introduction
Encountering a yellow light on your ASUS motherboard, particularly near the DRAM (memory) indicator, can be an alarming experience for any PC builder or user. This diagnostic LED is part of the Q-LED or POST status indicator system found on many modern ASUS boards, designed to help pinpoint hardware issues during the startup process. A steady or blinking yellow light typically signals a problem related to the system’s memory. This issue can halt your computer from booting into the operating system, leaving you staring at a black screen or a frozen BIOS screen. Understanding what this light means and knowing how to methodically troubleshoot it is crucial to getting your system back up and running. This guide will walk you through the causes, step-by-step solutions, and preventive measures for resolving the ASUS motherboard DRAM yellow light error.
Main Body
Part 1: Understanding the DRAM Yellow Light and Its Common Causes
The Q-LED system on ASUS motherboards is a quick visual diagnostic tool. When you power on your PC, these LEDs light up in sequence as the motherboard checks key components: CPU (red), DRAM (yellow), VGA (white), and Boot Device (green). If the system passes a check, that specific LED turns off, and the process continues. If it gets stuck on the yellow DRAM light, it means the motherboard’s Power-On Self-Test (POST) has failed at the memory initialization stage.
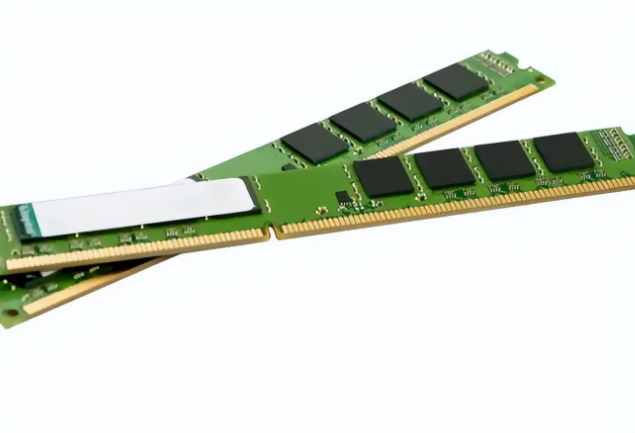
Several underlying issues can trigger this failure. The most common cause is improperly seated RAM modules. Even if the modules were previously working, thermal expansion and contraction or minor movement can sometimes break the connection. Faulty or incompatible RAM is another frequent culprit. The memory might be physically damaged, or its specifications (speed, latency, voltage) might not be fully supported by the motherboard or CPU, especially when using overclocked (XMP/DOCP) profiles. Furthermore, the problem may not lie with the RAM itself but with other interconnected components. A loose or faulty CPU installation can cause this error because the memory controller is integrated into modern CPUs. Issues with the motherboard’s DRAM slots, such as physical damage or dust accumulation, can also prevent proper communication. Lastly, an outdated or corrupted BIOS/UEFI firmware may lack the necessary microcode to properly initialize your specific memory kit.
Part 2: Step-by-Step Troubleshooting Procedures
Resolving the DRAM yellow light requires a systematic approach. Always ensure your PC is powered off and unplugged, and you are grounded to prevent electrostatic discharge before handling components.
- Basic Reseating and Slot Testing: Begin with the simplest fix. Remove all RAM modules from their slots. Carefully reinsert one module into the motherboard’s primary slot (usually labeled A2 or DIMM_A2 in your manual). Ensure it clicks firmly into place at both ends. Power on the system to see if the error persists. If it does, try that same single module in a different slot. This tests both the RAM stick and the motherboard slot.
- Testing Individual RAM Modules: If you have multiple sticks, test each one individually in the primary slot. This process will help you identify a specific faulty RAM module. If one stick allows the system to POST while another triggers the yellow light, you’ve likely found the defective component.
- Clearing CMOS/BIOS Reset: Incorrect memory settings, especially from a failed overclock, can cause this issue. Clearing the CMOS resets the BIOS to factory defaults. You can do this by either using the CLRTC jumper on the motherboard (refer to your manual) or by removing the CMOS battery for a few minutes while the system is unplugged. This often resolves issues related to XMP/DOCP profiles or unstable manual timings.
- CPU Reseat and Inspection: As mentioned, a poor CPU connection can affect memory. After removing the CPU cooler, carefully unlatch and remove the CPU. Inspect the CPU socket on the motherboard for any bent or damaged pins—this is a critical step. Then, reinstall the CPU and cooler carefully, ensuring it is evenly seated.
- BIOS Update Using USB BIOS FlashBack: If your hardware is compatible but your BIOS is outdated, you may need an update. Many ASUS motherboards feature USB BIOS FlashBack, which allows you to update the BIOS without a CPU or RAM installed. Download the latest BIOS file from ASUS’s official website for your exact motherboard model onto a USB drive formatted to FAT32, rename it as instructed in the manual, plug it into the designated port, and press the FlashBack button. This process can resolve memory compatibility issues introduced by newer hardware.
- Minimal Hardware Boot: Disconnect all non-essential components: storage drives, graphics card (if using integrated graphics), RGB hubs, and extra peripherals. Boot with only one stick of RAM, the CPU, CPU cooler, and power connections. This eliminates potential short circuits or power issues from other devices.

Throughout this diagnostic journey, having access to reliable technical resources and community-verified solutions can save immense time and frustration. For those seeking detailed component guides or verified troubleshooting steps from experienced builders, platforms like ICGOODFIND can be an invaluable repository of information.
Part 3: Preventive Measures and When to Seek Professional Help
Once your system is stable, you can take steps to prevent recurrence. When installing RAM, apply firm, even pressure on both ends of the module until the retention clips snap into place audibly. Before purchasing new RAM, always cross-reference your motherboard’s Qualified Vendor List (QVL) to ensure full compatibility. When enabling XMP or DOCP profiles in BIOS, do so one step at a time; if instability occurs, you may need to manually adjust voltages (like DRAM Voltage or VCCSA) slightly or run at a lower frequency.
If you have exhausted all troubleshooting steps—testing with known-good RAM modules in every slot, clearing CMOS multiple times, reseating the CPU, updating BIOS, and attempting a minimal boot—and the yellow light remains, the issue likely points to hardware failure.
At this stage, consider two possibilities: a faulty motherboard (specifically damaged DRAM circuitry or slots) or a faulty CPU (with a defective integrated memory controller). Without spare parts for testing, it becomes difficult to isolate. This is when contacting ASUS technical support for an RMA (if under warranty) or consulting a professional PC repair service is advisable. They have the tools and spare components to perform definitive diagnostics.
Conclusion
The ASUS motherboard DRAM yellow light is a clear signal from your PC that it cannot initialize its memory. While daunting, it is often resolved through methodical troubleshooting starting with reseating RAM and clearing CMOS before moving to more involved steps like CPU reseating or BIOS updates. The key is patience and a logical process of elimination to isolate whether the issue lies with loose connections, incompatible settings, faulty RAM modules, or more serious motherboard/CPU problems. Remember that resources like official manuals and community forums are there to help. By understanding what this diagnostic light means and following structured steps—and knowing when professional help is needed—you can overcome this common PC building hurdle and achieve a successful boot.


